Mission Badge Poster
Your photo on top, and the same picture stitched into a field-mission patch below
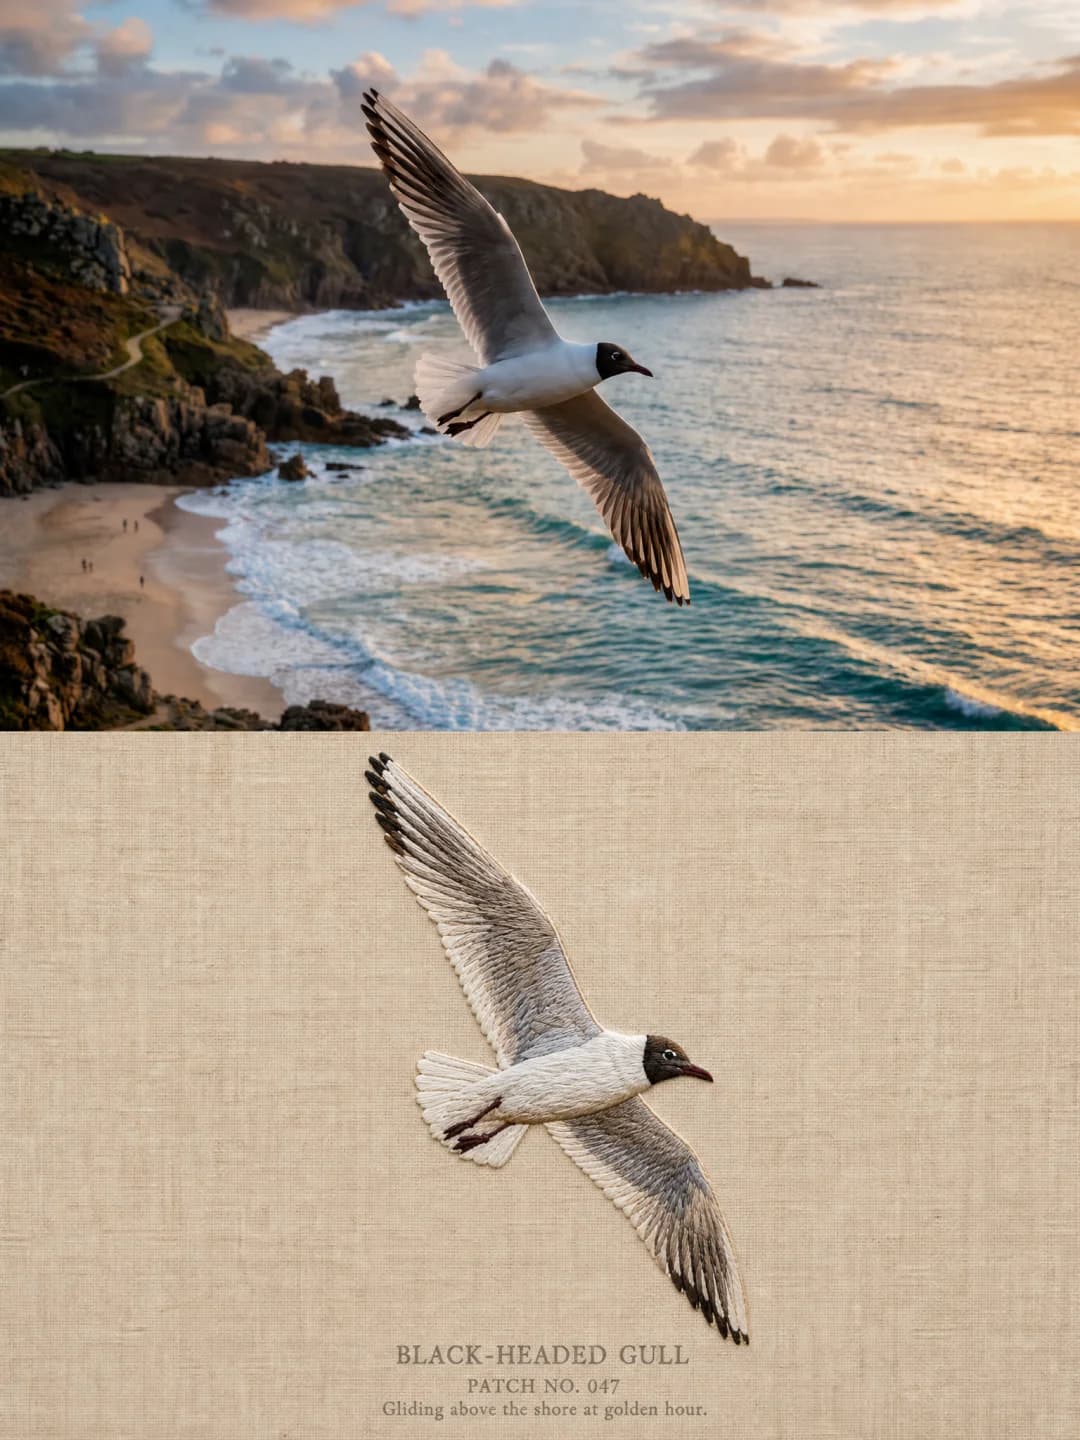
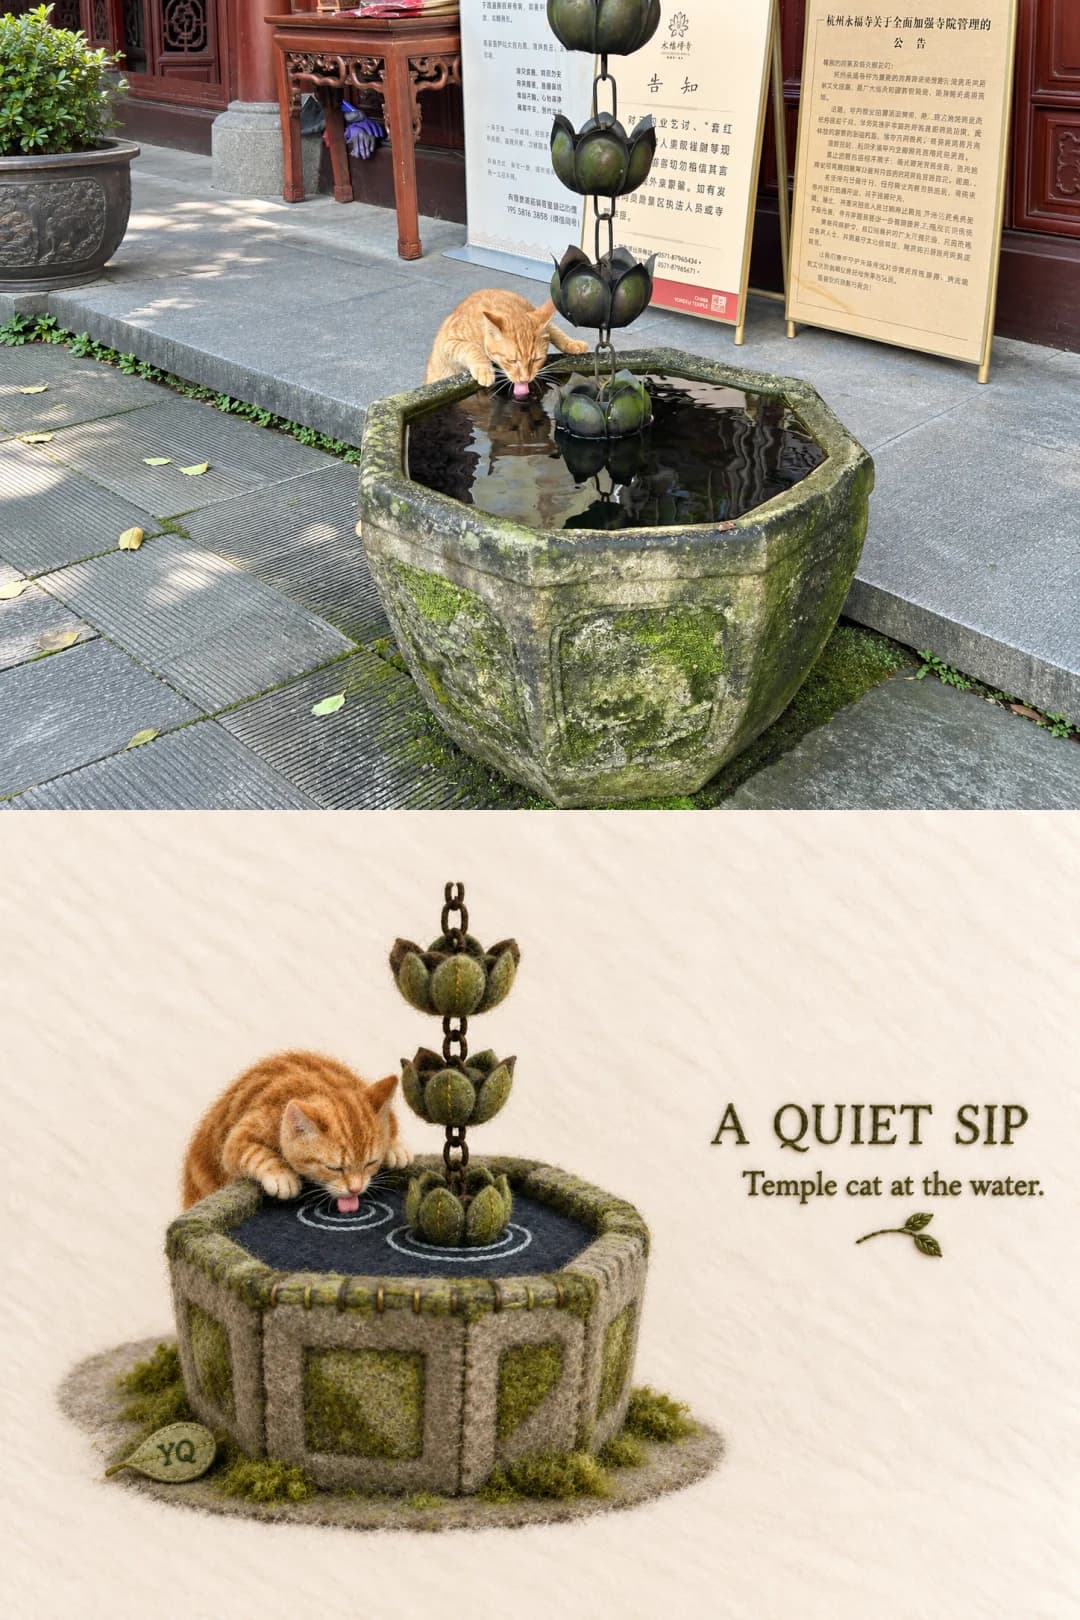
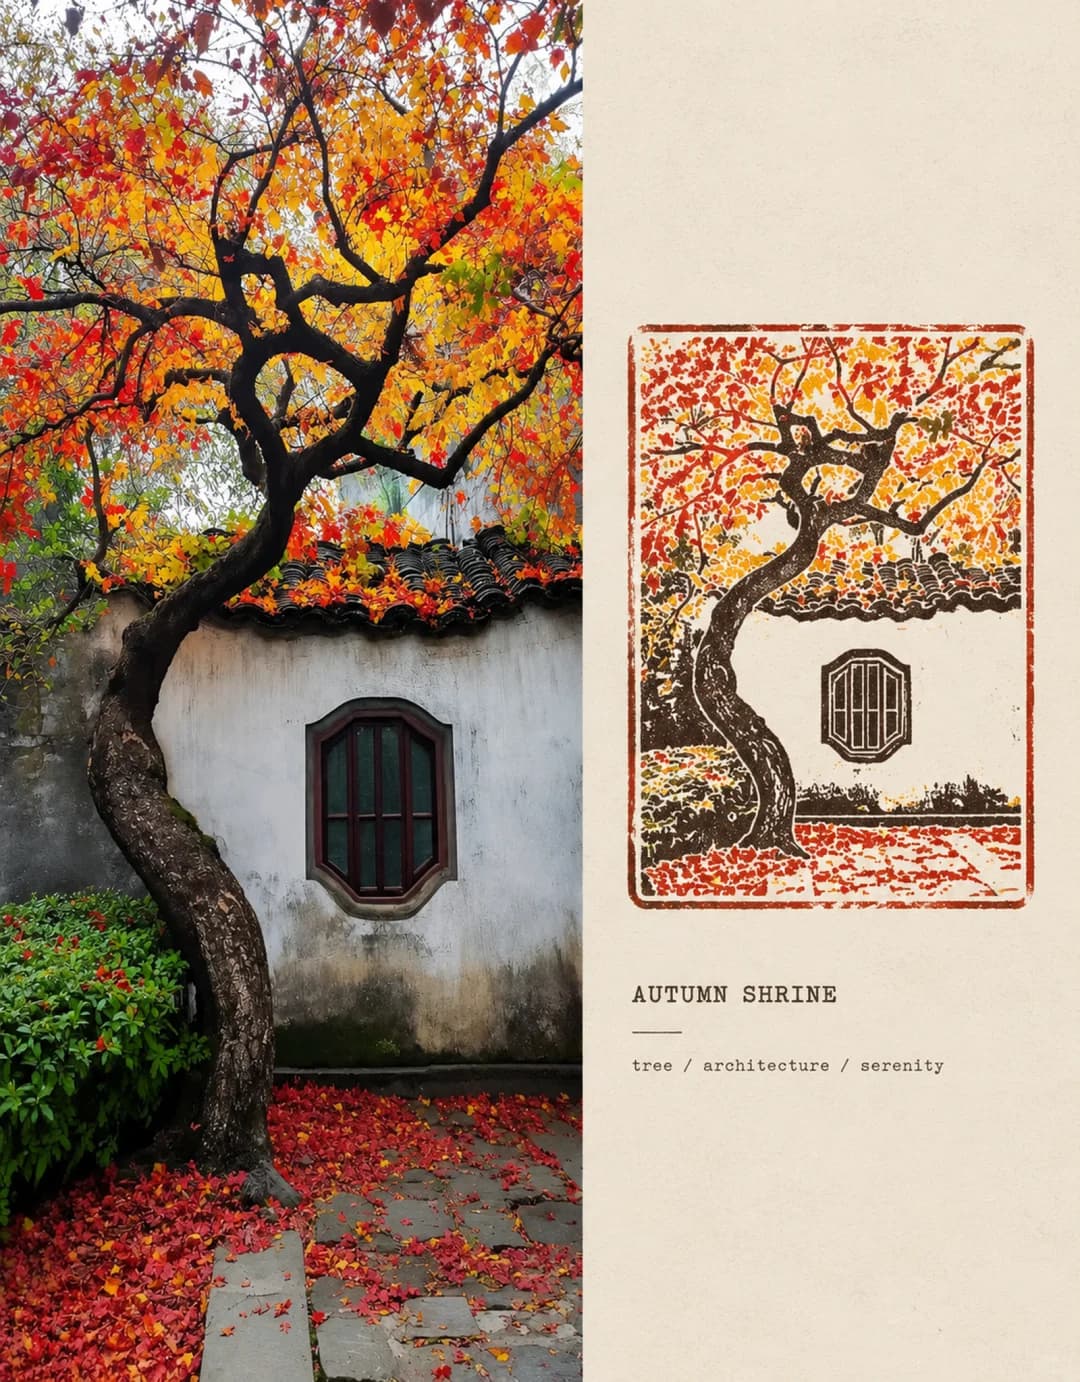
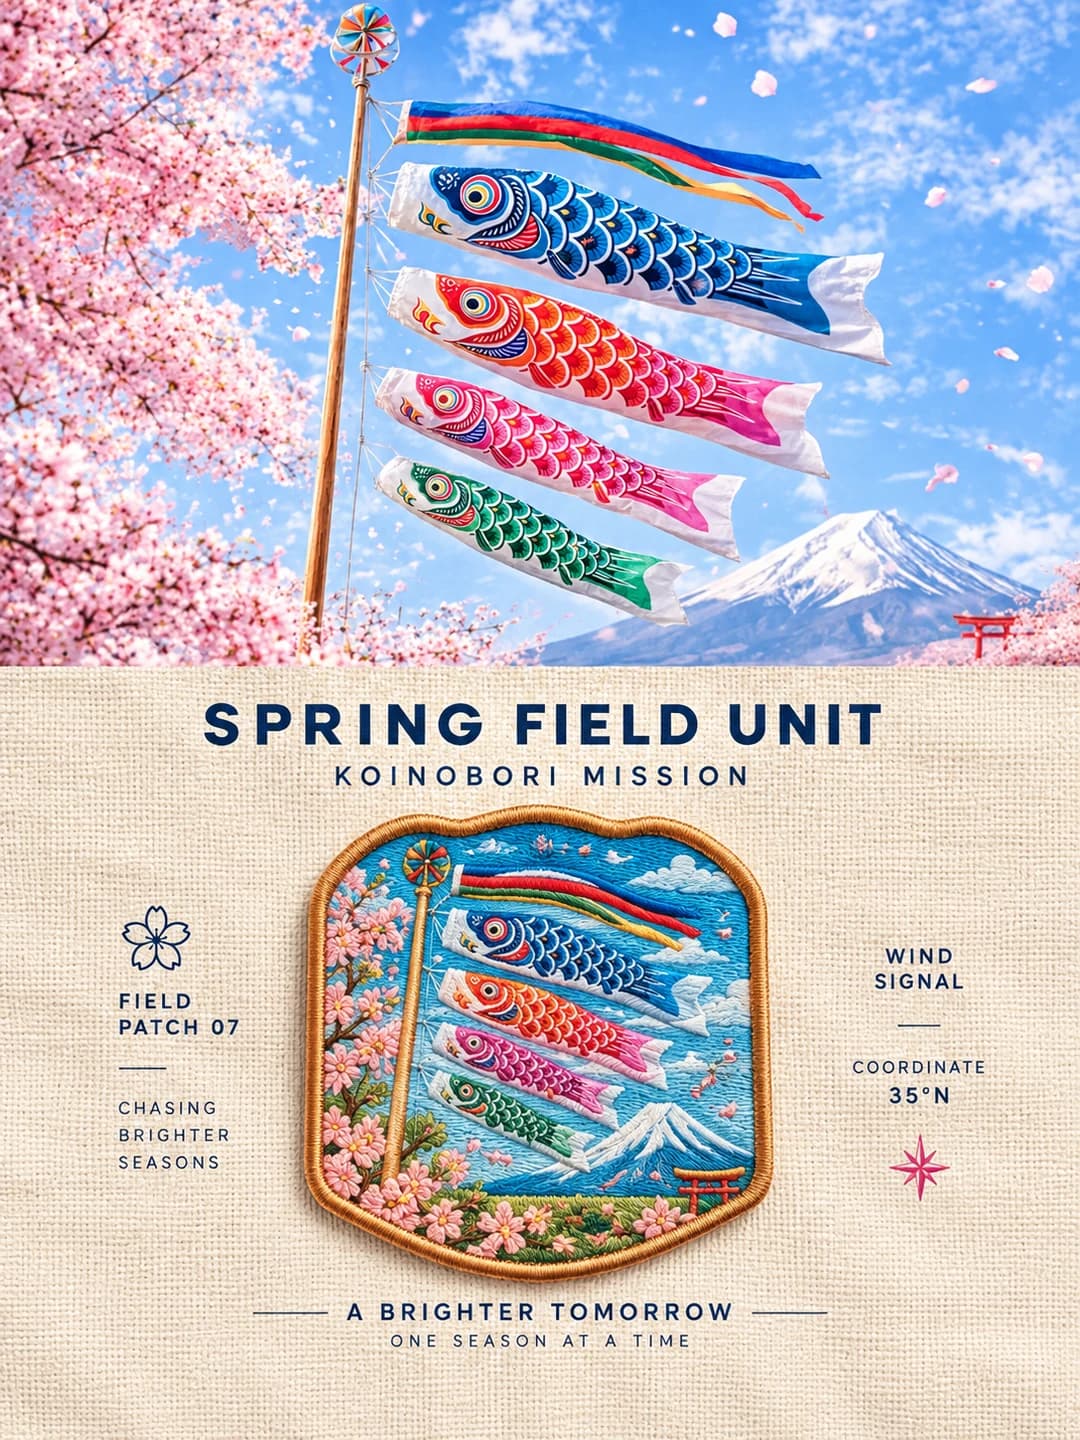
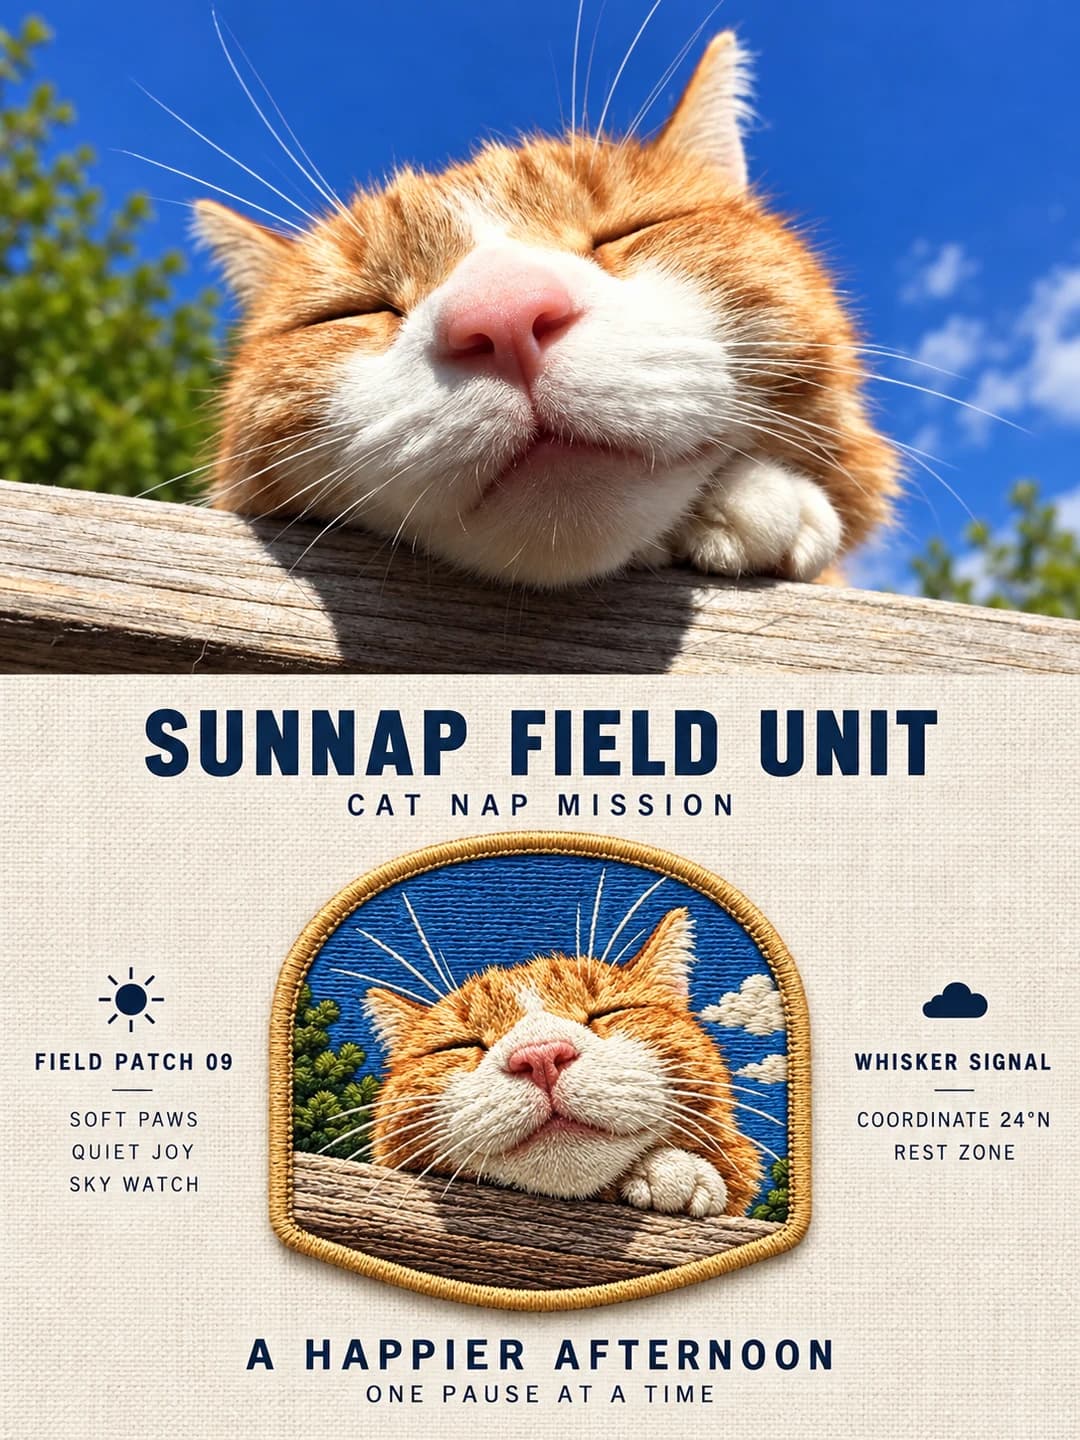
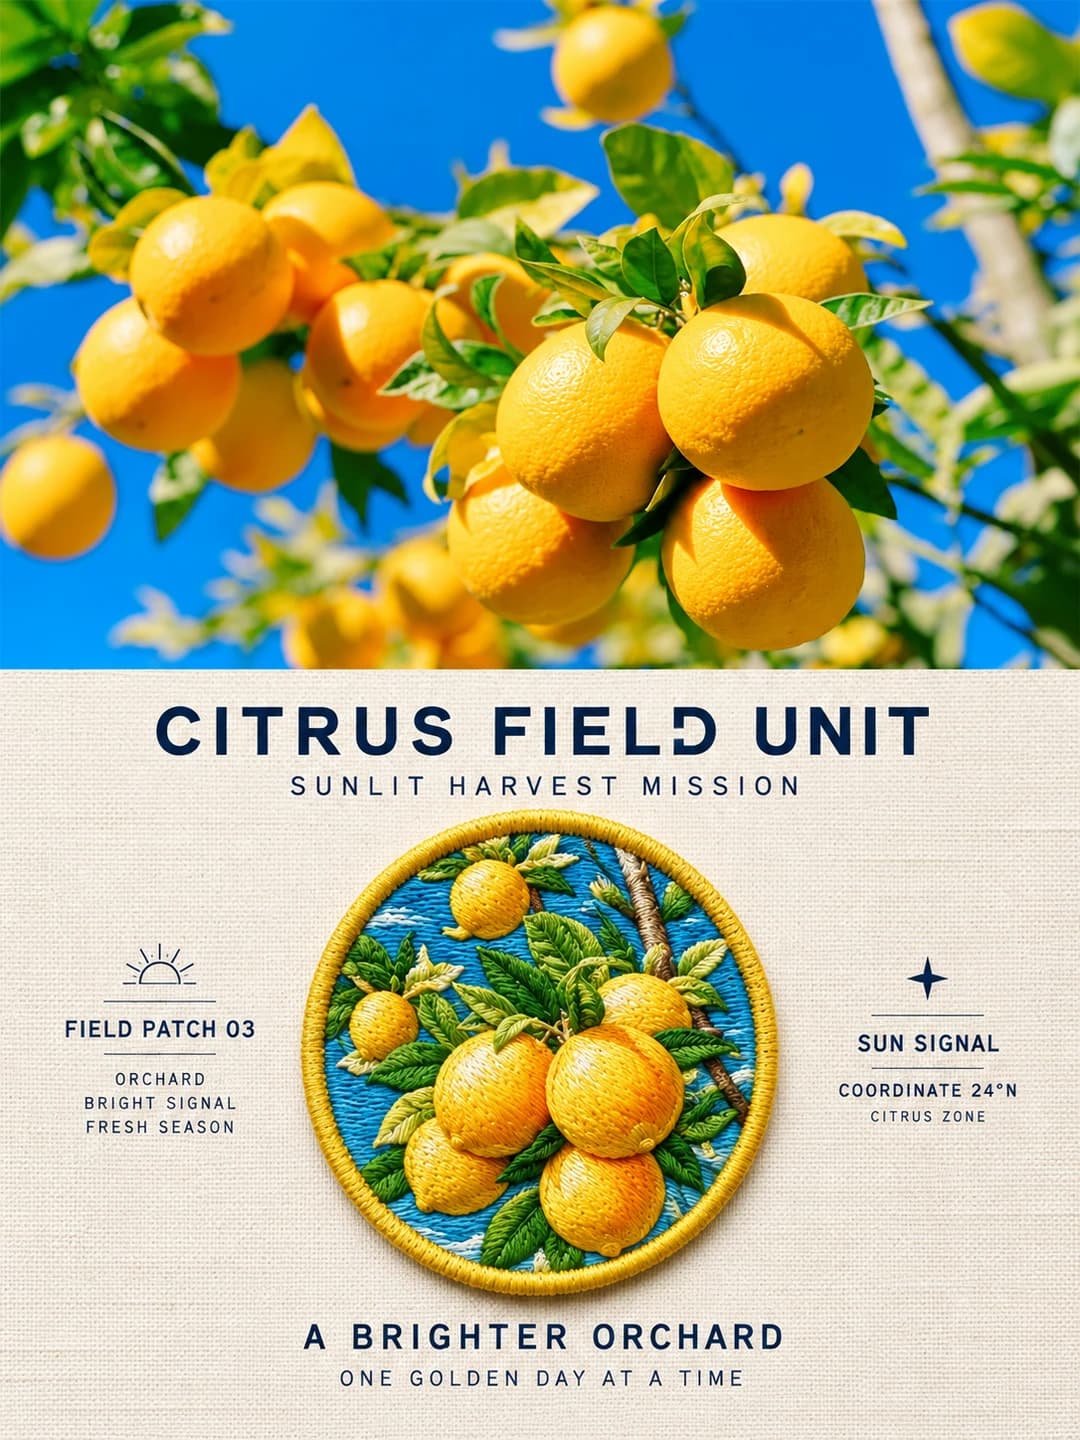
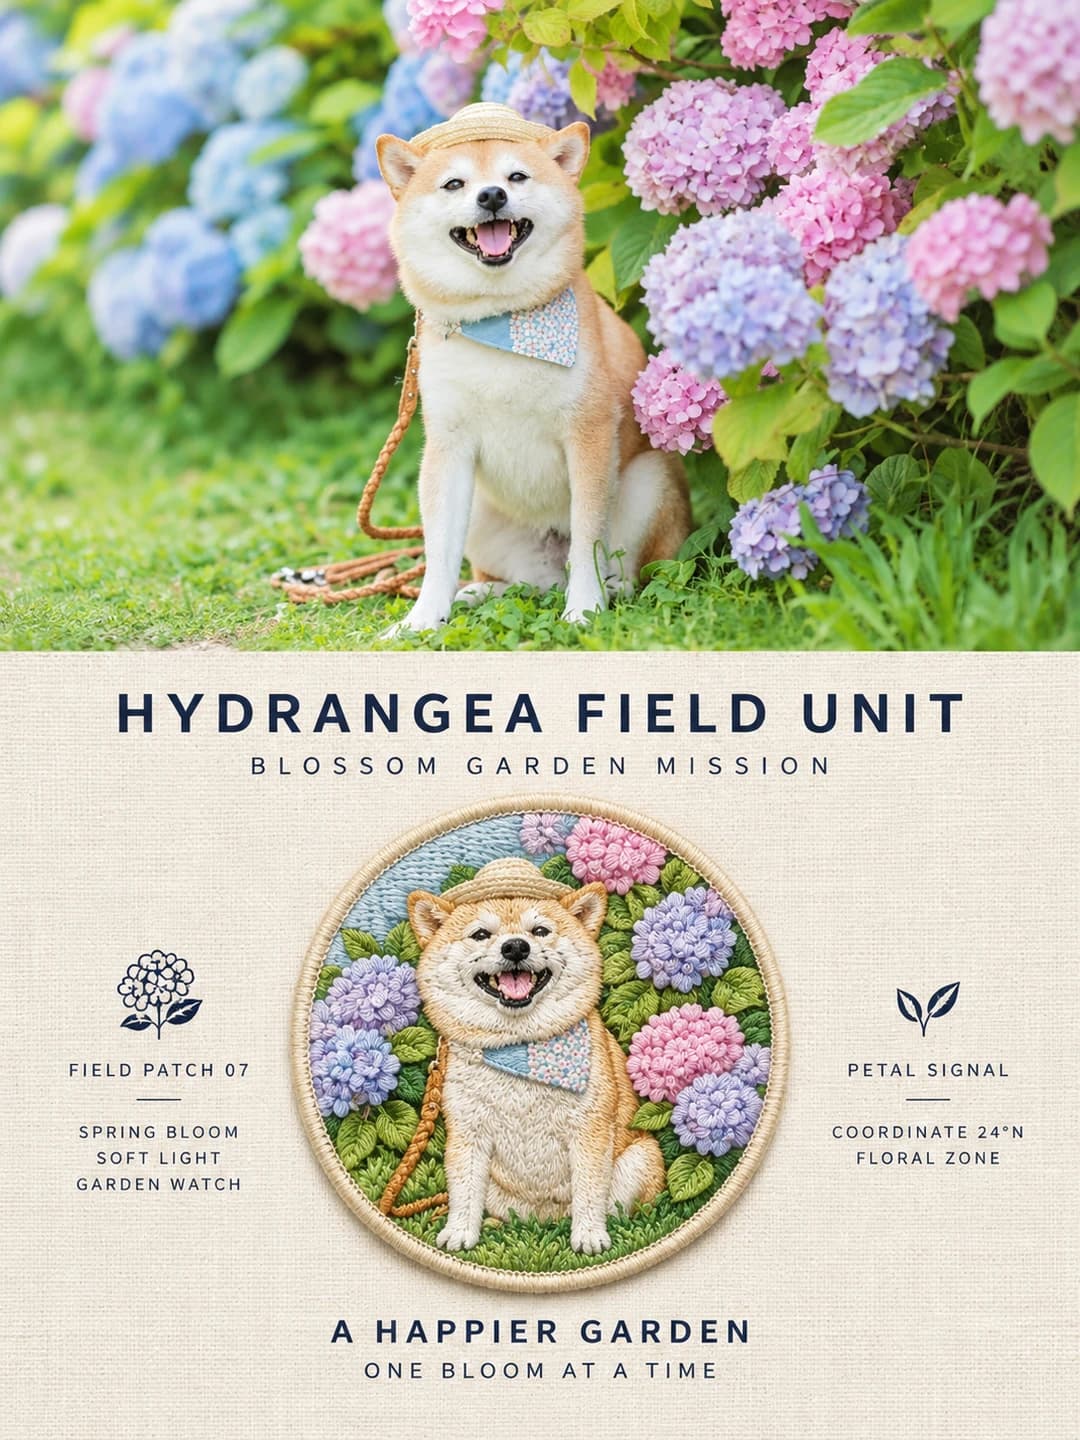
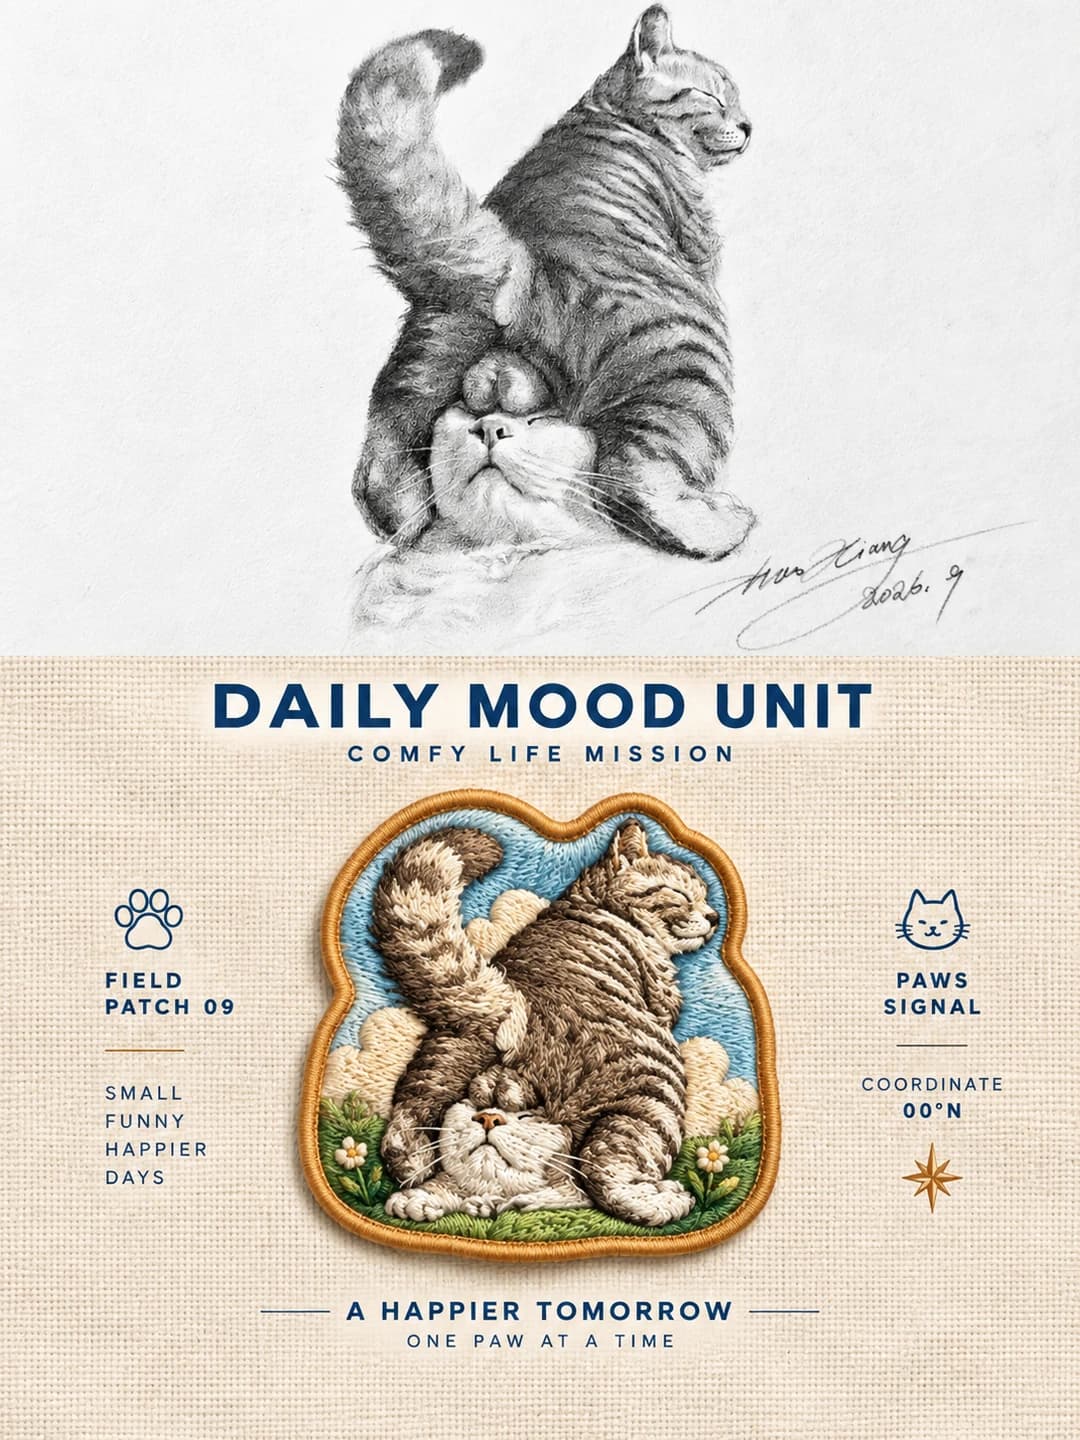
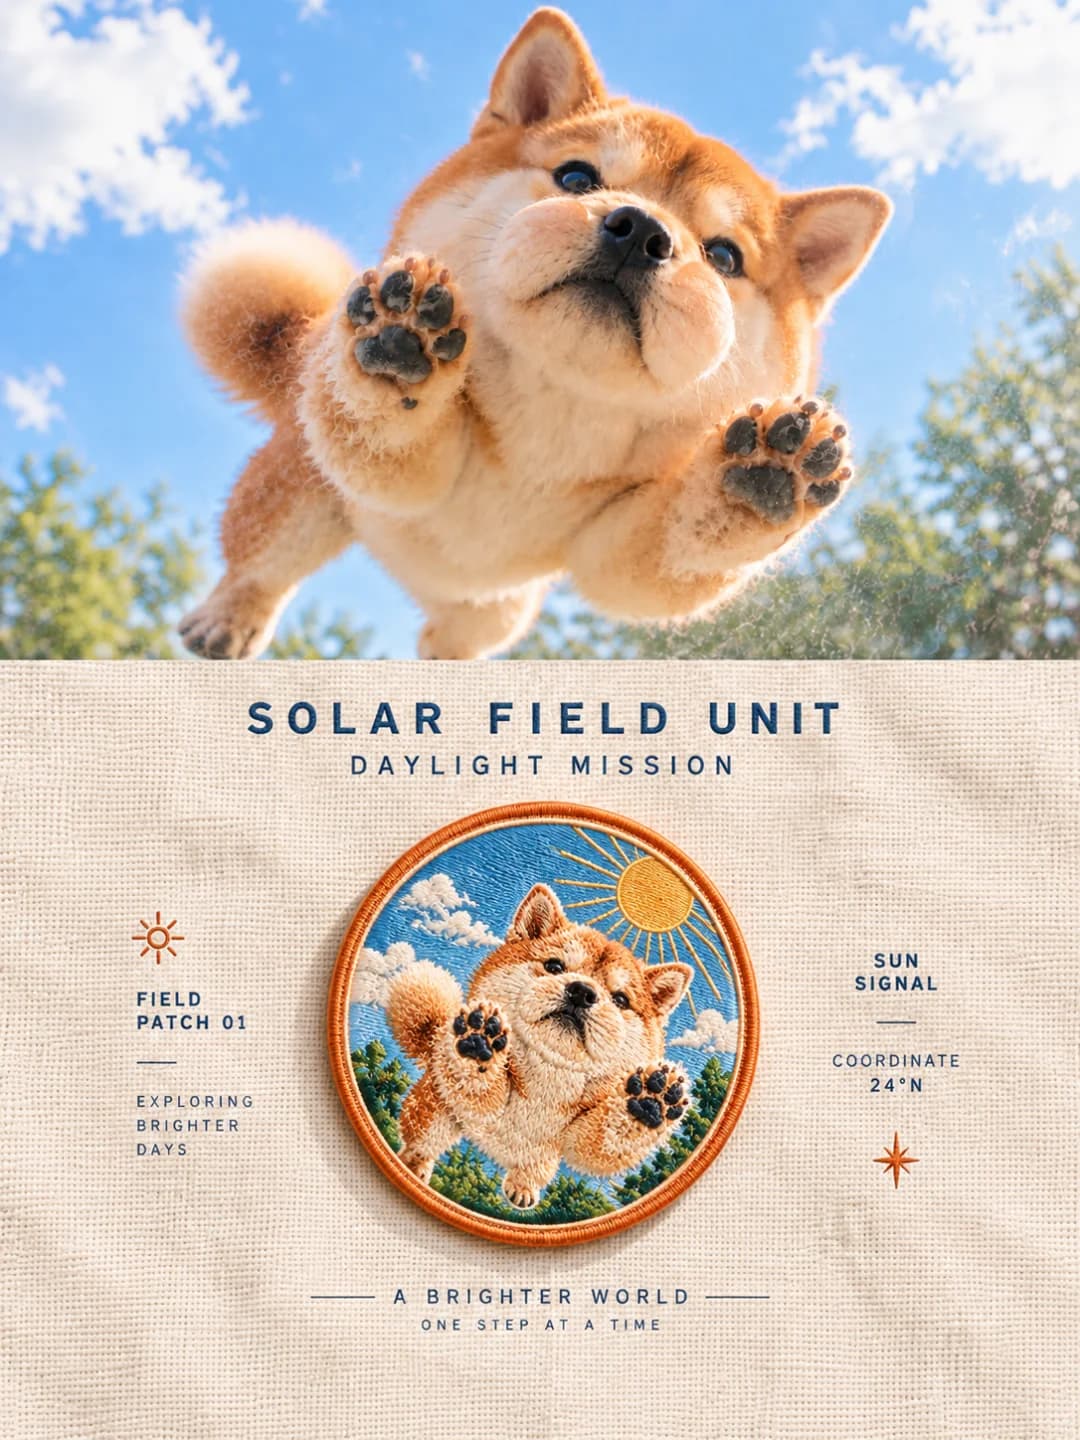
Upload a photo and get back a 3:4 poster split exactly in half. The top is your photo, edge to edge. The bottom is warm linen with the same subject machine-embroidered into a single shaped badge, framed by a bold title, small archive notes and a two-line slogan.
100 credits per image · about a minute · New accounts get 500 credits — 5 free images.
Try it with your own photo
New accounts get 500 credits — 5 free images.
Examples
Every image below was made with the prompt on this page.
What is a Mission Badge Poster?
A mission badge poster is a 3:4 vertical image divided exactly 1:1. The top half is your photo, full-bleed and unchanged apart from cropping. The bottom half is warm off-white linen with one embroidered badge in the centre, about 40% of the width, stitched from the same subject: satin-stitch fur, fill-stitch sky, a merrowed border. The badge's outline is chosen to suit the subject — shield, pennant, arch, road sign, star — rather than defaulting to a circle. Around it the text is laid out in four tiers like an expedition archive: a 2-to-4-word title and an all-caps mission subtitle at the top, a FIELD PATCH number and SIGNAL name on either side, and two warm lines of English underneath.
Which photos work well?
Photos with one clear subject or a small group and a simple background: a pet napping or mid-jump, a dog among flowers, a branch of fruit against the sky, a field of tulips, a landmark with a few festival details. Bright, saturated colours carry well into thread. Landscape-shaped photos fit the top half best, because it is a 3:2 slot.
Which photos struggle?
Busy street scenes and wide crowds: the badge holds a few subjects, and the prompt tells the model to drop secondary detail, so a photo whose point is everything at once loses it. Portrait-shaped photos get cropped hard to fill the top half. If you want a quieter, specimen-card look with a single natural object and muted colours, the embroidery patch poster suits better; for soft wool rather than thread, try the needle felt travel poster.
How to turn a photo into a Mission Badge Poster
- 1
Pick an effect
Browse the samples on each tool page to see exactly what you will get before you spend anything.
- 2
Upload your photo
JPEG, PNG or WebP, up to 12 MB. Your photo stays private and is never used to train anything.
- 3
Add your own caption
Most effects let you set the text that appears in the final image, in any language.
- 4
Download the result
You get a high-resolution image, yours to use. 2K is 100 credits, 4K is 200.
The prompt behind this tool
This is the full prompt, translated into English. Copy it and use it with any image model that accepts a reference photo.
Turn the uploaded photo into one 3:4 vertical art poster — no collage, no grid of several images. The frame is split top and bottom at exactly 1:1, each half taking 50%. The top half is the real, original photo; the bottom half rebuilds the same core image as a real machine-embroidered mission badge, mixing an expedition-archive feel, vintage insignia and Swiss editorial design — refined, restrained and with room to breathe.

The top half is the original photo running full-bleed to the edges of the canvas and down to the centre dividing line: no white border, frame, card, tape or shadow. Keep the subject's identity, number, pose and clothing, and the setting, composition, proportions, perspective, light, depth of field, colour and every recognisable detail. The only things allowed are cropping at the same proportions, extending the background naturally and a light colour adjustment — no stretching or warping, no moving or replacing the subject or scene, no changed actions and no unrelated additions.

The bottom half takes the original photo as its only source. It translates the core subject, its outline, action, colours, mood and visual centre of gravity into a single main embroidered mission badge, so the two halves clearly come from the same picture. Keep the identity, number and interaction of people or groups; the breed and pose of animals; the season and form of plants; the terrain of a landscape; the outlines and spatial relationships of buildings and still life. Pull in only a little of the background, drop secondary details, and do not reproduce the whole photo or add decoration. Choose the badge's shape to suit the subject — circle, oval, shield, pentagon or hexagon, arch, rounded square or trapezoid, mountain triangle, road sign, pennant, shoulder patch, five-pointed star or a soft custom shape. The outline must be complete, natural and something that could actually be made; it must not simply be a stretched circle, nor give up recognisability for an unusual shape. One main badge per poster.

The whole bottom half is warm off-white linen with a fine plain weave, natural fibres, slight undulation and soft light and shadow. The badge sits in the centre at 38–45% of the full width, with generous warm-white margin all round, touching neither the dividing line nor the edges. Render the fabric base, cotton or mercerised thread, fill stitches, raised satin stitch, stitch direction, the thickness of the material and the merrowed border truthfully; stitches change direction and density for petals, fur, clothing and sky. Colours come from the original photo, cleaned up in brightness and purity, with small contact shadows. No vector art, plastic, 3D, digital painting, oil painting, stickers or product renders.

Lay out the bottom half in four tiers: a title at the top, the badge in the centre, archive notes left and right, and a mood line at the bottom. Write the English yourself from the photo's subject — natural meaning, correct spelling, no garbled brand names. At the top, a bold 2-to-4-word sans-serif title in deep navy or charcoal, with an all-caps mission subtitle beneath it. Left and right, a few line icons with a FIELD PATCH number, keywords, a SIGNAL name or an invented mission category, balanced asymmetrically; where the place or time is unknown, do not make up coordinates. Under the badge, two warm, story-like lines of English, optionally with a fine rule, a star burst or a line drawing on the theme. Text is clear and fairly large, consistently aligned, with open letter and line spacing, mostly dark with a little of the theme colour, and never crowding the badge.

The two halves contrast clearly in material but are tied together by the subject, colour and mood. No badge locked to a circle, no large off-centre placement, no repeated patterns, titles or numbers, no busy backgrounds, dense decoration, fake lettering, logos or watermarks, and nothing that breaks the 1:1 structure.
Frequently asked questions
Will it change my photo?
- The top half is meant to be your photo as taken — same people or animals, same pose, light and colour, only cropped or extended at the edges if the frame needs it. Image models occasionally redraw a photo anyway, so look at the top half before you use the poster and run it again if it is not your picture.
Why isn't the badge always round?
- The prompt picks the outline from the subject: a shield, a pennant, a road sign, a mountain triangle, an arch, a star. A sleeping cat on a fence came out as an arch, a fruit branch as a circle, carp streamers as an arch-topped patch. You cannot choose the shape, but a fixed circle is explicitly banned.
Can I set the title?
- Yes, and it is the more reliable option. Type the top title (up to 32 characters) and, if you like, the mission subtitle under it, and the model is told to set them exactly. The side archive notes and the two lines under the badge are always written by the model from your photo.
Are the coordinates and patch numbers real?
- No. The FIELD PATCH number, the SIGNAL name and the mission category are invented props that make the poster read like an expedition archive. The prompt tells the model not to make up coordinates when it cannot know the place, but it sometimes does — treat any coordinate on the poster as decoration.
What language can the text be in?
- The layout was designed for short English in capitals, and the model writes the side notes and slogan in English. Your own title can be in any language; Chinese or Japanese works, though long titles crowd the top tier.
Which photos work best?
- One clear subject or a small group against a simple background: a pet, a person with a surfboard, a branch of fruit, a flower bed, a landmark. Pencil drawings and paintings work too; the badge keeps the pose but may stitch a black-and-white drawing in colour and add a little sky or grass.
What size do I get, and how long does it take?
- A 3:4 vertical image: 2K (1792×2400) for 100 credits or 4K for 200. Most come back in under a minute; a few take up to a minute and a half.
What happens to my photo?
- It is stored privately, used only to make your image, deleted on a schedule, and never used for training.