โปสเตอร์คอลลาจกระดาษฉีก (Torn Paper Collage Poster)
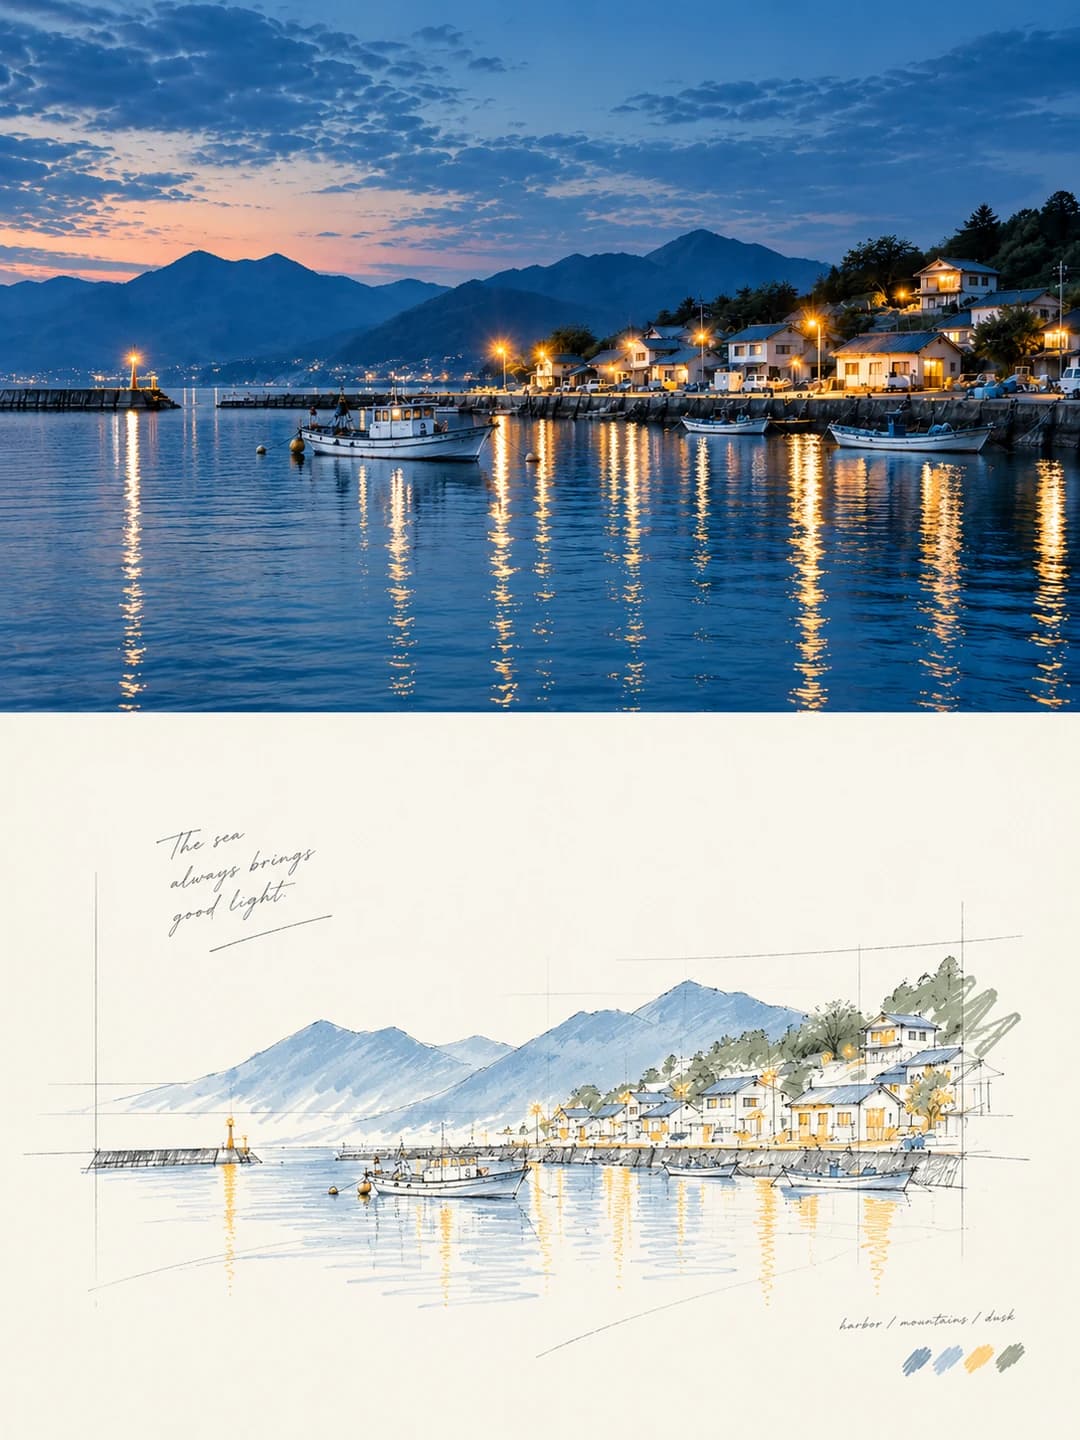
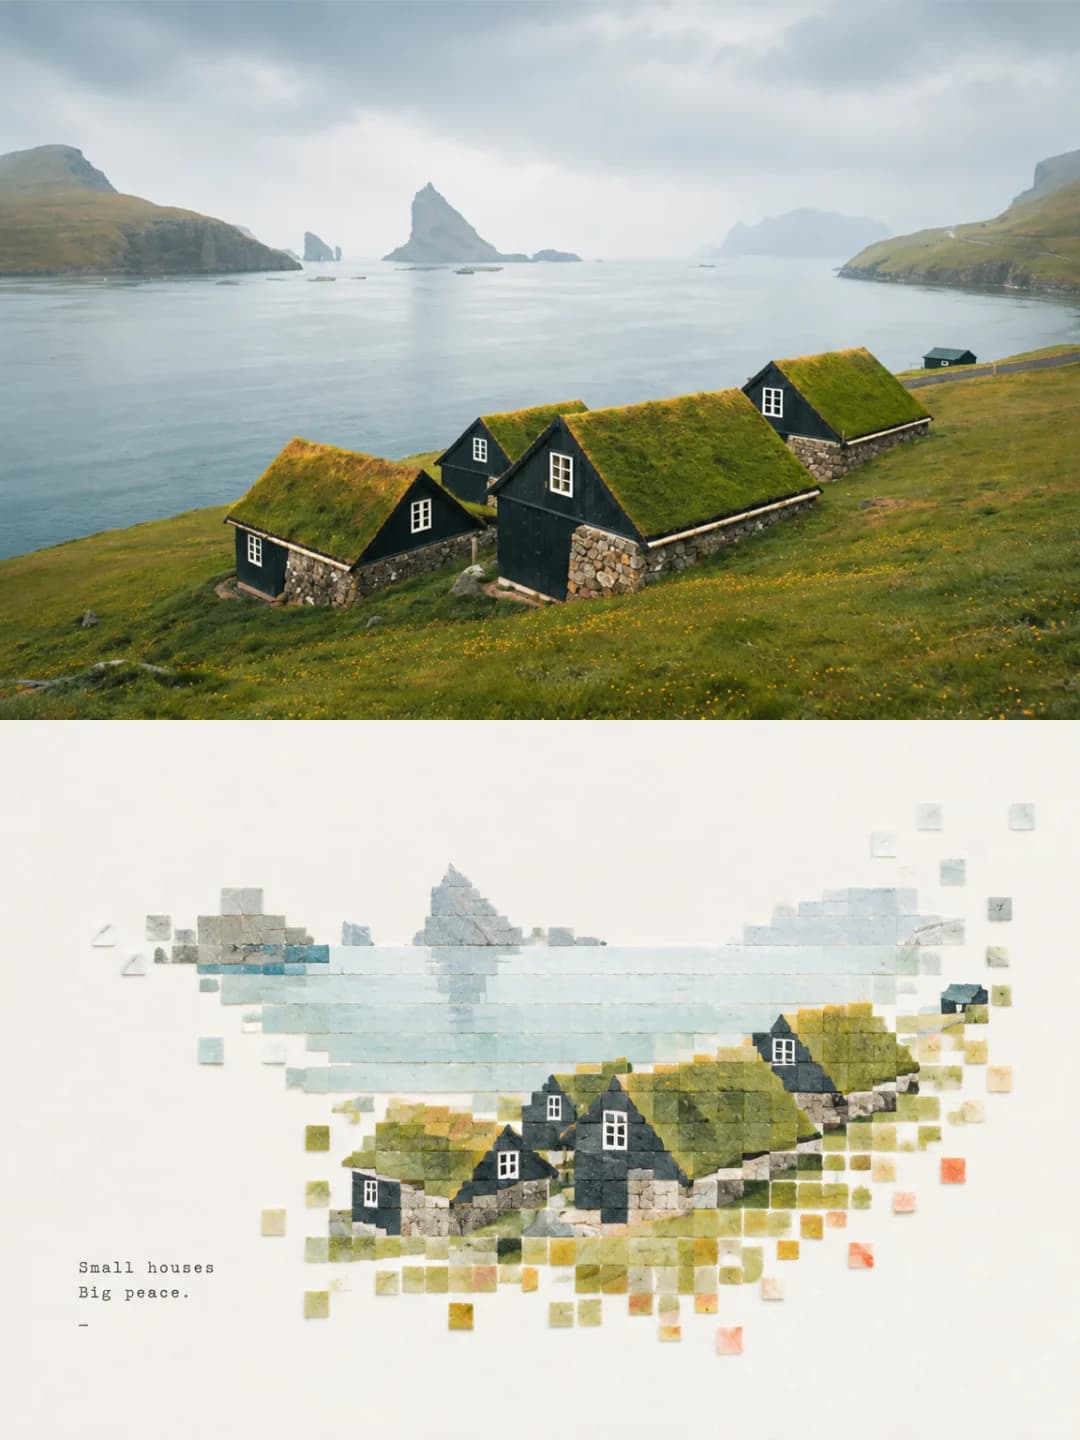
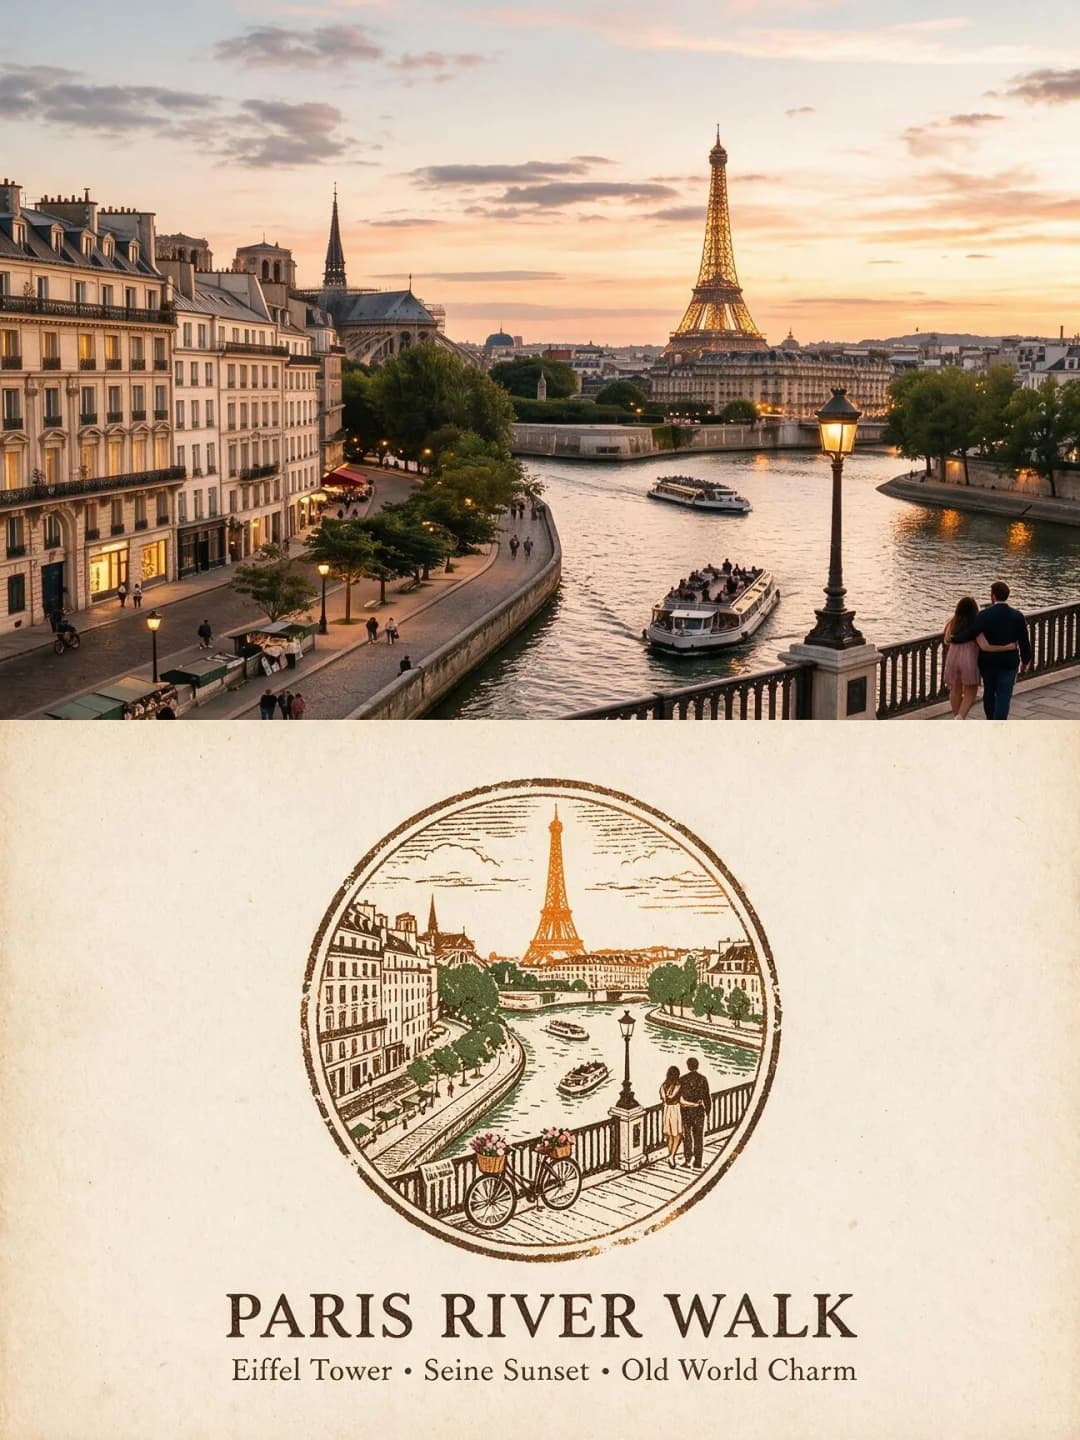
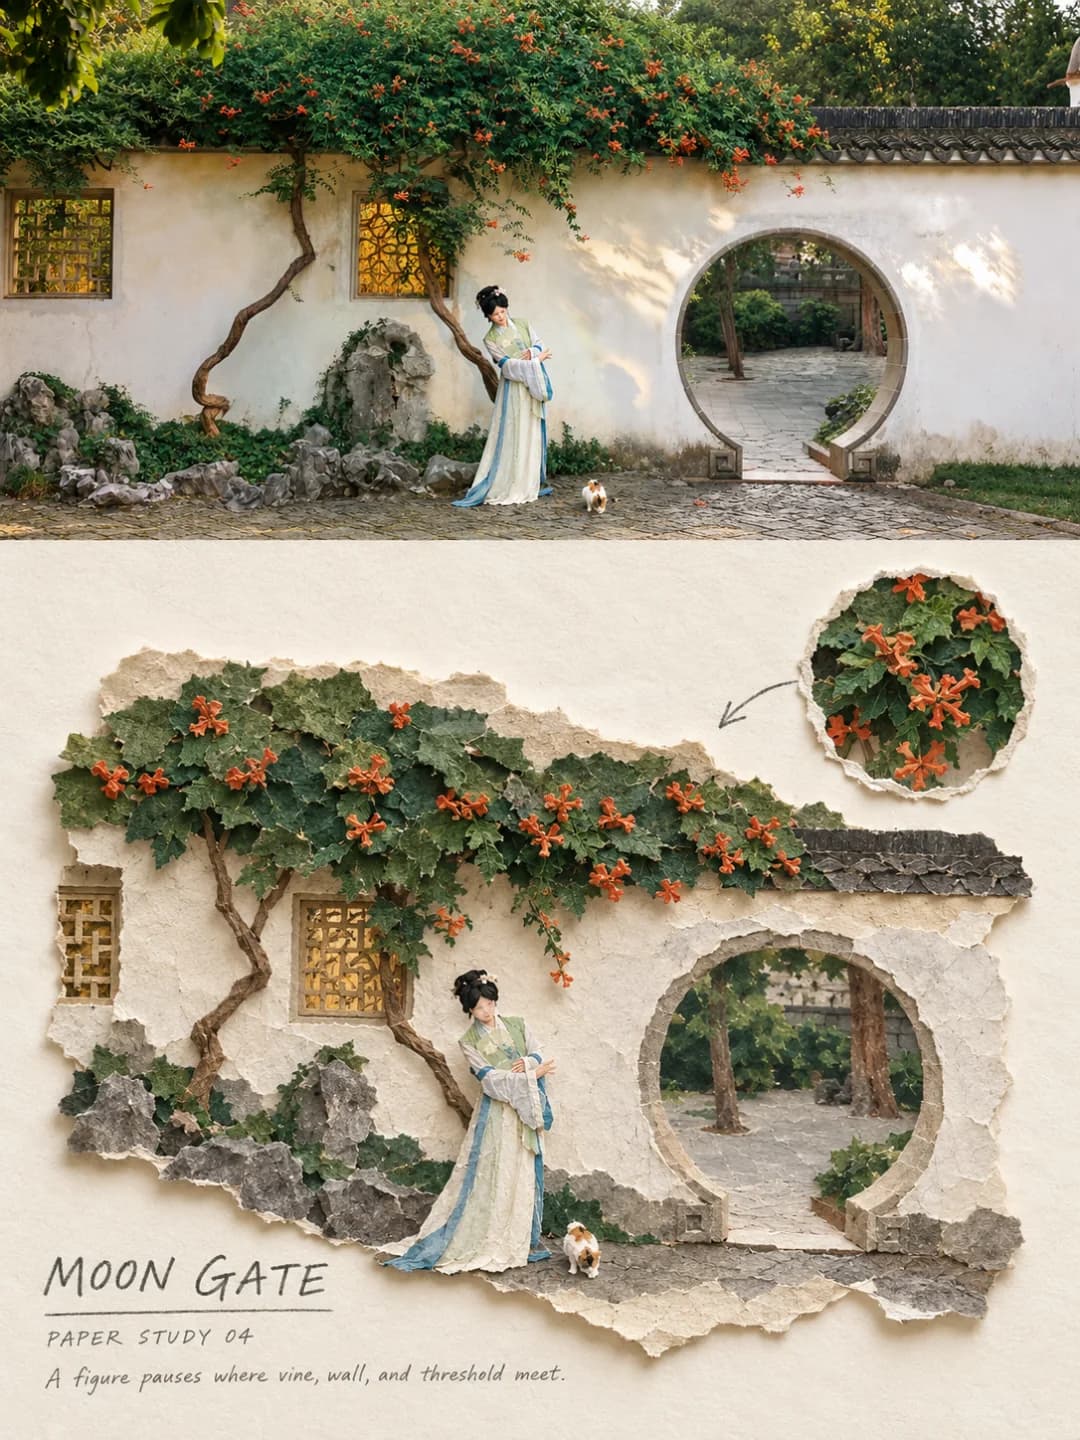
รูปถ่ายของคุณอยู่ด้านบน พร้อมฉากเดียวกันที่สร้างขึ้นใหม่ด้วยกระดาษฉีกมือที่ด้านล่าง
อัปโหลดรูปภาพเพื่อรับโปสเตอร์ขนาด 3:4 โดยแบ่งเป็นภาพถ่ายของคุณที่ด้านบน และฉากเดียวกันที่สร้างขึ้นใหม่ด้วยเทคนิคคอลลาจกระดาษฉีกมือที่ด้านล่าง เห็นรอยฉีกเป็นเส้นใย ความหนาของกระดาษจริง และเงาตกกระทบสั้นๆ พร้อมวงกลมขยายรายละเอียดเฉพาะจุด
100 เครดิตต่อภาพ · ใช้เวลาประมาณหนึ่งนาที · บัญชีใหม่รับ 500 เครดิต — สร้างภาพฟรี 5 ภาพ
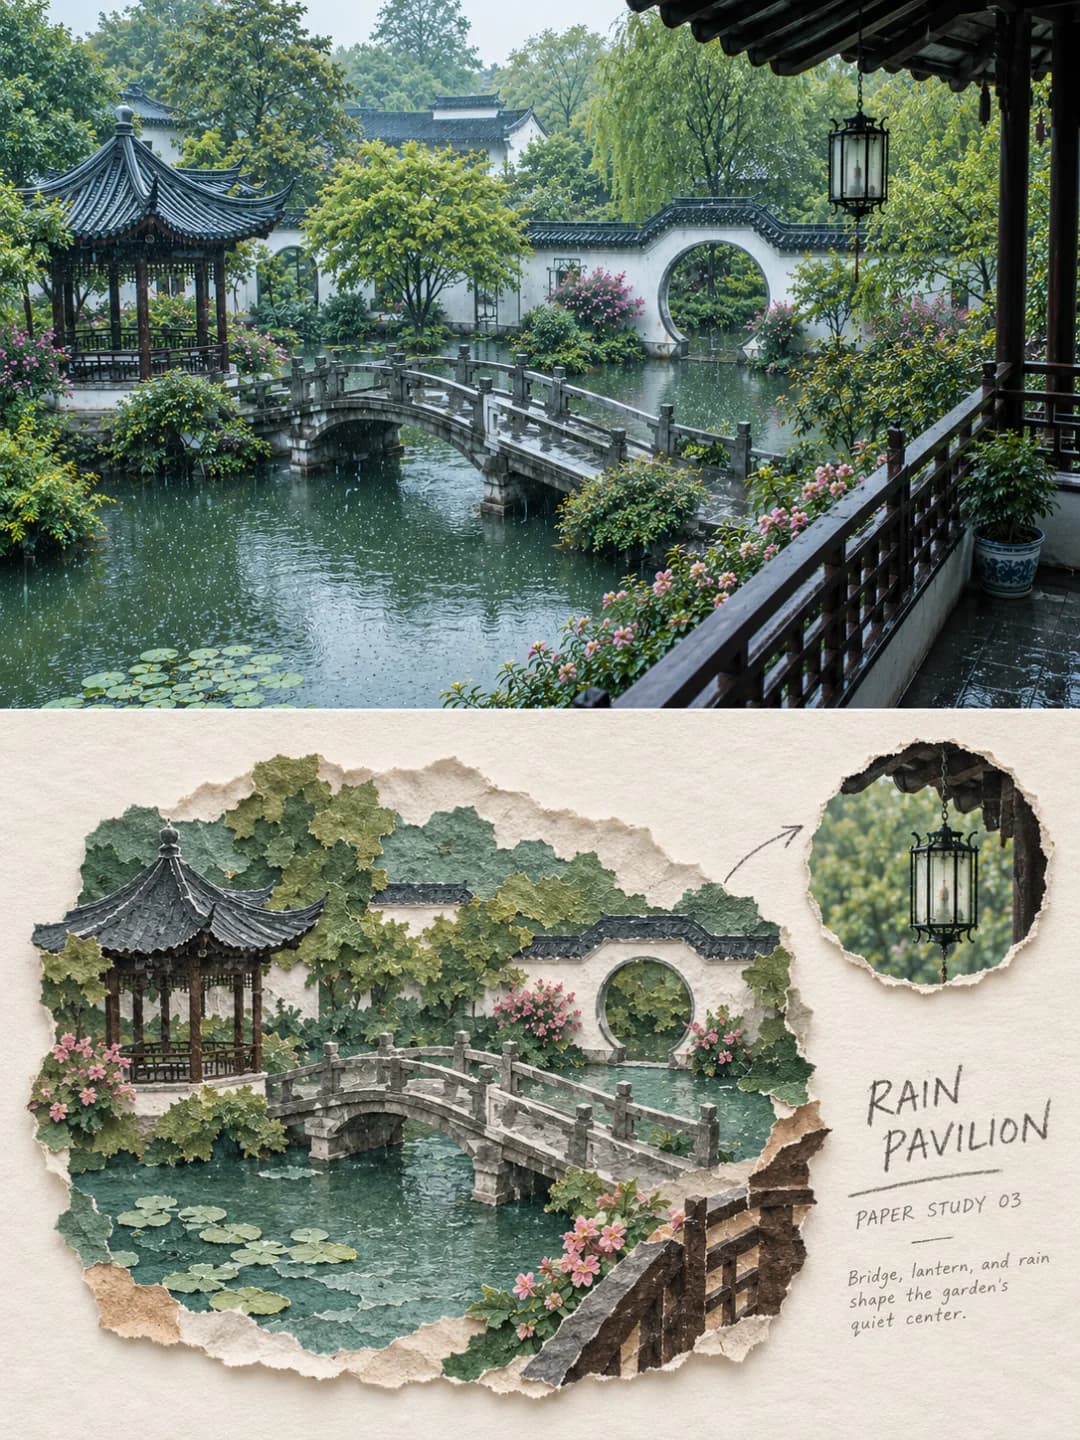
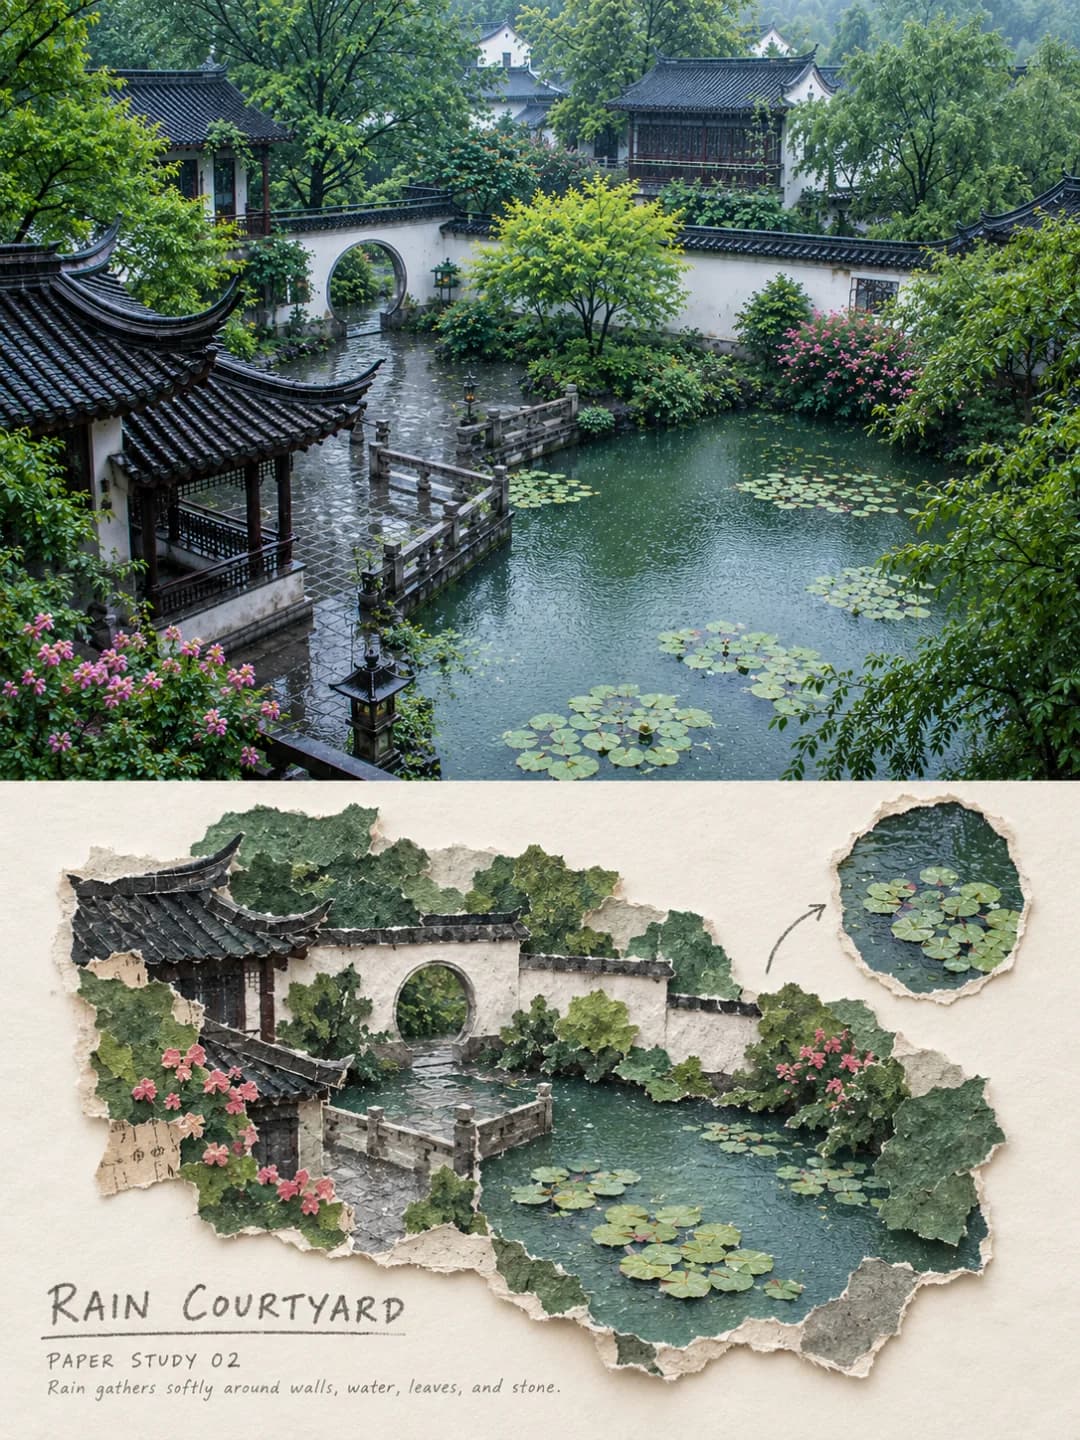
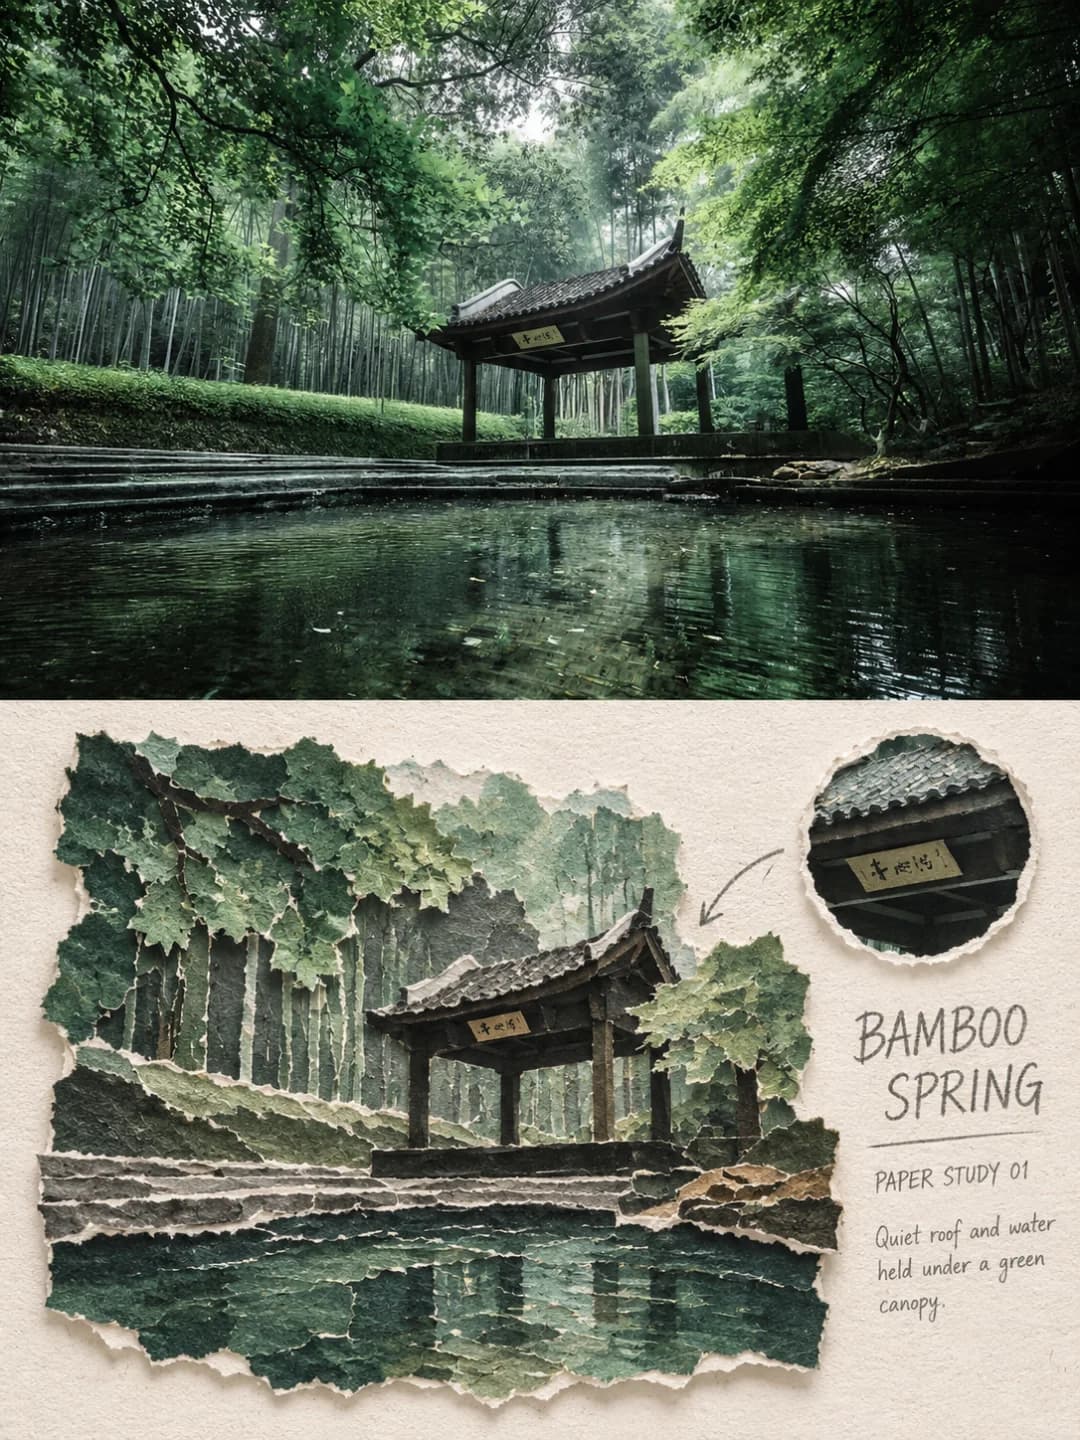
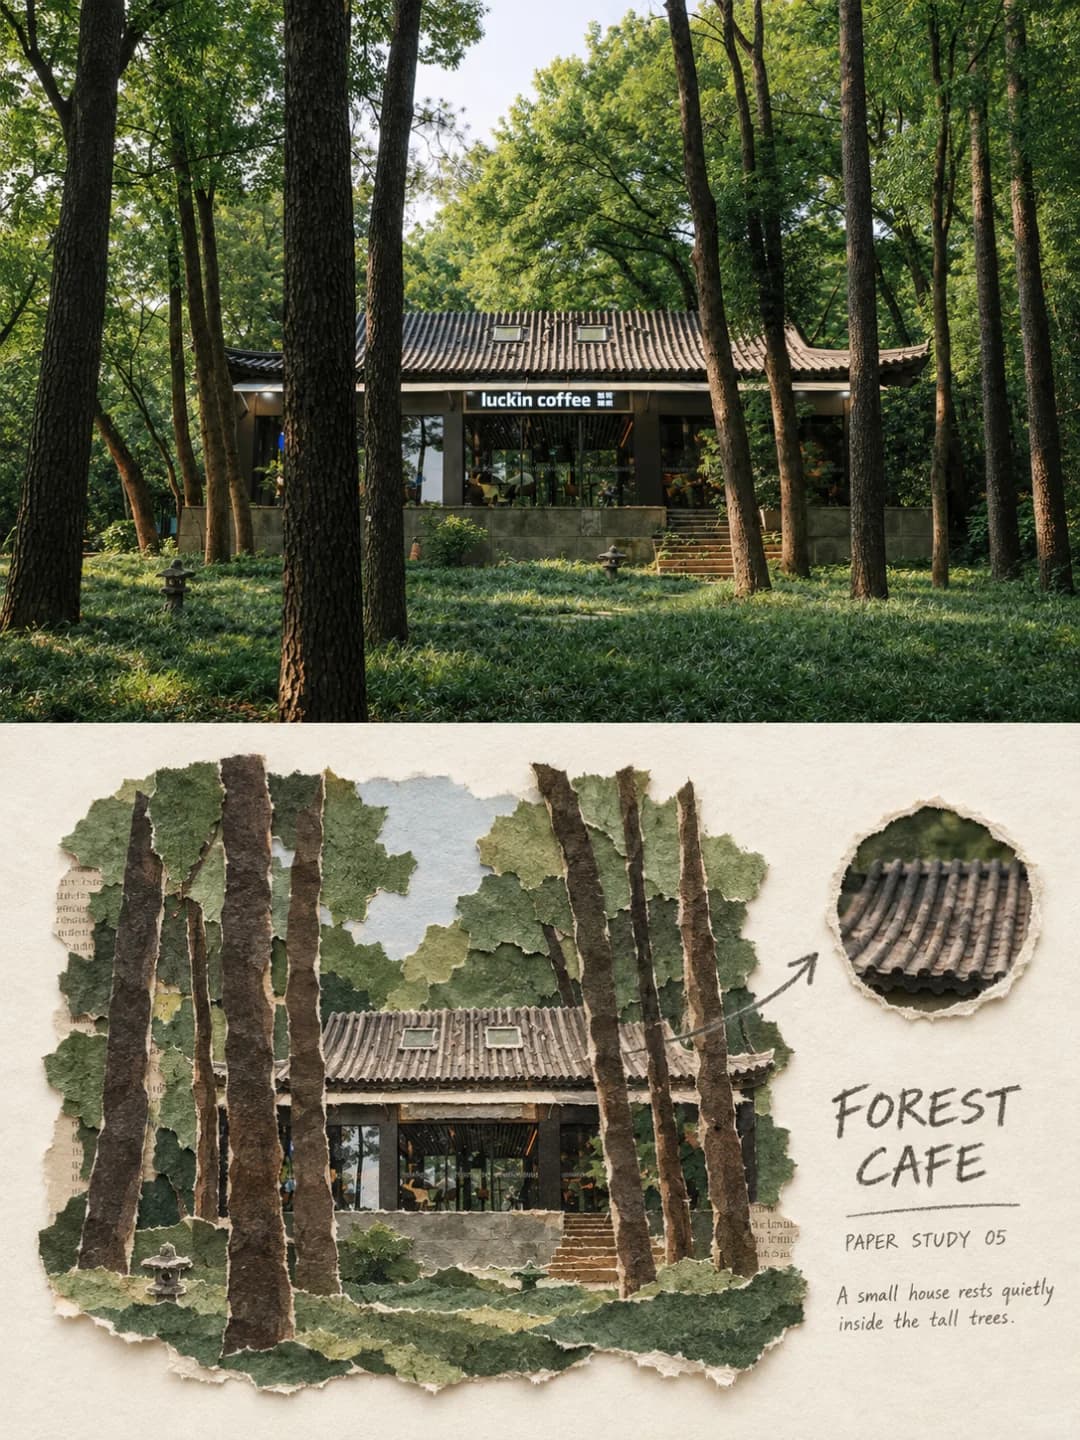
ลองใช้กับรูปภาพของคุณเอง
บัญชีใหม่รับ 500 เครดิต — สร้างภาพฟรี 5 ภาพ
ตัวอย่าง
ภาพทุกภาพด้านล่างนี้ถูกสร้างขึ้นด้วยพรอมต์ที่แสดงบนหน้านี้
โปสเตอร์คอลลาจกระดาษฉีก (Torn Paper Collage Poster) คืออะไร?
โปสเตอร์คอลลาจกระดาษฉีกคือการแบ่งเฟรมขนาด 3:4 ออกเป็นสองส่วนตามแนวนอน ส่วนบน (เกือบครึ่งหนึ่งของความสูง) คือรูปถ่ายต้นฉบับที่คงรายละเอียดมุมมอง อาคาร ยานพาหนะ ผู้คน และแสงไว้อย่างครบถ้วนด้วยการปรับสีสไตล์นิตยสารท่องเที่ยว ส่วนล่างคือการสร้างฉากเดิมขึ้นใหม่ในรูปแบบคอลลาจ: ทั้งผนังอาคาร หลังคา ถนน ต้นไม้ และผู้คน ถูกสร้างจากกระดาษใยธรรมชาติผิวด้าน กระดาษสา กระดาษลูกฟูก และกระดาษคราฟท์ที่ฉีกด้วยมือ แสดงให้เห็นขอบกระดาษที่เป็นเส้นใย การวางซ้อนทับ และเงาตกกระทบจริง มีวงกลมกระดาษฉีกขยายรายละเอียดหนึ่งจุดพร้อมลูกศรดินสอชี้กลับไปยังตำแหน่งเดิม โดยใช้โทนสีเทา 5-7 เฉดที่ดึงมาจากรูปถ่ายของคุณ
ภาพแบบไหนได้ผลดี?
เหมาะสำหรับภาพที่มีมิติและโครงสร้างชัดเจน เช่น ตรอกระหว่างตึก ลานกลางบ้าน หลังคาวัด สะพานข้ามน้ำ หน้าร้านค้า หรือกำแพงสวน งานคอลลาจต้องการเส้นนำสายตาที่ชัดเจนและวัตถุที่ระบุตัวตนได้ง่าย เช่น โคมไฟ ร่ม ผู้คน หรือป้าย เพื่อนำมาฉีกเป็นรูปทรง
ภาพแบบไหนมักมีปัญหา?
ไม่เหมาะสำหรับภาพพอร์ตเทรตหรือภาพโคลสอัพ เนื่องจากกระดาษฉีกจะทำให้ใบหน้าดูแบนเป็นเพียงรูปทรง นอกจากนี้ยังไม่เหมาะกับภาพที่แบนราบไม่มีมิติ หรือภาพฝูงชนจำนวนมาก เนื่องจาก AI จะตัดรายละเอียดที่ซ้ำซ้อนอย่างหน้าต่างหลายๆ บานหรือกลุ่มคนที่วุ่นวายออกโดยตั้งใจ ทำให้ภาพที่ออกมาอาจดูโล่งกว่าที่คาดไว้
วิธีเปลี่ยนรูปถ่ายให้เป็น โปสเตอร์คอลลาจกระดาษฉีก (Torn Paper Collage Poster)
- 1
เลือกเอฟเฟกต์
เรียกดูตัวอย่างบนหน้าเครื่องมือแต่ละชิ้น เพื่อดูผลลัพธ์ที่คุณจะได้รับก่อนตัดสินใจใช้จ่าย
- 2
อัปโหลดรูปภาพของคุณ
ไฟล์ JPEG, PNG หรือ WebP ขนาดไม่เกิน 12 MB รูปภาพของคุณจะยังคงเป็นส่วนตัวและไม่ถูกนำไปใช้ในการฝึกฝน AI ใดๆ
- 3
เพิ่มคำบรรยายของคุณเอง
เอฟเฟกต์ส่วนใหญ่ช่วยให้คุณสามารถกำหนดข้อความที่จะปรากฏในภาพสุดท้ายได้ ไม่ว่าจะภาษาใดก็ตาม
- 4
ดาวน์โหลดผลลัพธ์
คุณจะได้รับภาพความละเอียดสูง ซึ่งเป็นของคุณโดยสมบูรณ์ 2K ใช้ 100 เครดิต, 4K ใช้ 200 เครดิต
พรอมต์ที่อยู่เบื้องหลังเครื่องมือนี้
นี่คือพรอมต์ฉบับเต็มที่แปลเป็นภาษาอังกฤษ คัดลอกและนำไปใช้กับโมเดลภาพใดก็ได้ที่รองรับภาพอ้างอิง
Turn the uploaded photo into a single high-end torn-paper editorial art poster — not a collage of several images. Use a vertical 3:4 diptych composition: the top holds the real original photograph, clearly visible; the bottom rebuilds the same scene as a "torn-paper scene reconstruction". The two bands are close to equal in height, separated by a clean horizontal edge — no haze, no bleeding between them. Output the face of the poster only: no picture frame, no wall, no hand-held mockup.

The top band occupies roughly 47–50% of the frame and preserves the original photograph faithfully. Keep the viewing angle, the direction of the vanishing point, the slope of the road, the buildings on either side, the eaves, the doors and windows, the signage, the vehicles, the plants, the overhead wires, and the number and posture of any people, along with the original natural light and colour. Apply only light travel-magazine grading and the thinnest film grain; it must still read clearly as real photography. The sky, the road surface or quiet parts of the surroundings may be extended naturally to fit the frame, but do not repaint buildings, move people, alter vehicles, stretch, mirror or duplicate the subject.

In the lower band, do not simply put a paper filter over the same framing, and do not assemble rectangular photo fragments. First choose the single dominant vanishing line of the space, the main facades on either side, and one to three objects that best identify the place — a pedestrian, a vehicle, a lantern, an umbrella, overhead wires, a plant, a sign or a roof. Actively delete repeated window panes, complicated crowds, irrelevant small objects and photographic noise, then reorganise what remains into a smaller, clearly outlined, physical torn-paper scene.

The reconstructed scene fills about 60–82% of the lower band, centred or slightly offset, with roughly 20–35% of continuous ivory paper left around it. Re-judge the scale and visual hierarchy against the original so that the most recognisable building, object or figure becomes the anchor on the sheet; do not transcribe the photograph's full composition. A small torn circular window may be added in the white space, enlarging one real detail taken from the original, connected back to the main scene by a single graphite arrow.

Build the facades, road surface, eaves, plants, sky and figures piece by piece from hand-torn matte fibre paper, thin rice paper, corrugated card, kraft paper and a little old printed stock. Every major shape must show clearly visible fibrous torn edges, slight overlaps, real paper thickness, lifted corners and short, natural cast shadows. Torn edges may be irregular, but the outline of the scene, the direction of the space, the boundaries of the buildings and the identity of the subject must stay legible. No smooth vector slices, no laser-cut edges, no flat digital shadows.

Take the colour entirely from the photograph above, reducing its complexity to five to seven greyed paper tones. Build the skeleton from the true dominant colours of the walls, the road, the roofs, the planting and the people, and keep exactly one characteristic accent from the original — a rust red, a cobalt blue, an olive green or whatever the photograph actually offers. Do not apply a fixed Japanese-travel palette to every location.

Text — generated
Arrange a restrained group of handwritten editorial type in the ivory white space to the right or below: one all-capitals headline of two or three words distilled from the place, the subject or the mood; a fine rule beneath it; a small numbered note under the rule; and one descriptive line of no more than twelve words. The type sits quietly on the blank paper and never covers the torn-paper scene.
คำถามที่พบบ่อย
มันจะเปลี่ยนคนหรือวัตถุในรูปของฉันไหม?
- ในส่วนบนจะไม่เปลี่ยนเลยครับ คำสั่ง (prompt) ของเราเข้มงวดมากในส่วนนี้ ทั้งมุมมอง อาคาร ป้าย ยานพาหนะ และจำนวนคนจะถูกรักษาไว้ตามต้นฉบับ ห้ามแก้ไขหรือเคลื่อนย้าย ส่วนแถบด้านล่างจะเป็นการสร้างใหม่ ซึ่ง AI จะจงใจลดทอนรายละเอียดที่ซ้ำซ้อนหรือความวุ่นวายออกไป
ฉันสามารถเลือกหัวข้อ (Headline) เองได้ไหม?
- ได้ครับ และเราแนะนำให้ทำด้วย หากคุณพิมพ์หัวข้อเอง AI จะใส่ข้อความตามนั้นเป๊ะๆ แต่ถ้าปล่อยว่างไว้ AI จะสรุปคำขึ้นมาเอง 2-3 คำจากภาพ ซึ่งบางครั้งอาจจะได้คำที่ไม่ตรงใจนัก
หัวข้อสามารถเป็นภาษาอะไรได้บ้าง?
- ภาษาใดก็ได้ครับ AI จะใส่ข้อความตามที่คุณกำหนด แต่เนื่องจากสไตล์อักษรเป็นแบบเขียนด้วยมือตัวพิมพ์ใหญ่ขนาดเล็ก แนะนำให้ใช้ข้อความสั้นๆ เช่น หัวข้อ 2-3 คำ และหมายเหตุอีกเล็กน้อยจะดูสวยที่สุด
วงกลมเล็กๆ ที่มีลูกศรคืออะไร?
- มันคือวงกลมกระดาษฉีกที่วางอยู่บนพื้นที่ว่าง เพื่อขยายรายละเอียดจริงจากรูปถ่ายของคุณ เช่น แผ่นกระเบื้องหลังคา โคมไฟ หรือกลุ่มดอกไม้ โดยมีลูกศรดินสอชี้กลับไปยังจุดเดิมในฉากหลัก AI จะใส่มาให้ในผลลัพธ์ส่วนใหญ่แต่ไม่ทุกภาพครับ
โทนสีมาจากไหน?
- ดึงมาจากรูปถ่ายของคุณโดยตรงครับ แต่จะถูกลดทอนลงให้เหลือเพียงโทนสีกระดาษเทา 5-7 เฉดตามสีผนัง ถนน หรือต้นไม้ และจะคงสีเด่นที่เป็นเอกลักษณ์ไว้เพียงสีเดียว เช่น แดงสนิม น้ำเงินโคบอลต์ หรือเขียวมะกอก เพื่อไม่ให้ภาพดูเหมือนภาพกราฟิกทั่วไป
ฉันจะได้ภาพขนาดเท่าไหร่?
- ขนาด 2K คือ 1792 × 2400 พิกเซล ซึ่งคมชัดเพียงพอสำหรับพิมพ์เป็นโปสเตอร์ ส่วน 4K จะมีความละเอียดเป็นสองเท่า โดยมีค่าใช้จ่าย 200 credits แทนที่จะเป็น 100 credits ครับ
ฉันสามารถใช้ Prompt ของตัวเองแทนได้ไหม?
- ในเครื่องมือนี้ไม่ได้ครับ เพราะมันทำงานด้วยคำสั่งที่ปรับแต่งมาเฉพาะตัว แต่เราได้เผยแพร่ข้อความ Prompt ทั้งหมดไว้ในหน้านี้แล้ว คุณสามารถคัดลอกไปลองปรับใช้เองในโปรแกรมสร้างภาพ AI อื่นๆ ได้ตามสบาย
จะเกิดอะไรขึ้นกับรูปถ่ายของฉัน?
- รูปภาพจะถูกเก็บไว้ในระบบส่วนตัวเพื่อให้ AI ประมวลผล และจะถูกลบตามกำหนดเวลา ภาพของคุณจะไม่ถูกเปิดเผยต่อสาธารณะ ไม่แสดงให้ผู้ใช้อื่นเห็น และไม่นำไปใช้เทรนโมเดลใดๆ